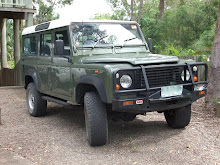
Replacing the suspension bushes on a 1993 200 TDI 110
Land Rover 200tdi Suspension Bushes replacement
The ride was rough and the steering was wonder, it could not wait any longer!
This Bush kit cost $95-00 which included the anti roll bar kit, I don’t have one and the shock rubber kit. In total with postage it was $117-00. Not badly prices I thought.
Check the kit to ensure you have the right part numbers for your vehicle
Gather your tools together; I had a large drive socket set, a trolley jack, a 24mm spanner, a 19mm spanner, pliers, ball joint remover, 12 tonne bench press, a screw driver, 17mm spanner and the set of bushes.
Some wooden blocks or wheel chocks.
Chock the font and rear wheels after parking it on a flat surface, started with the Panhard rod, this consisted of two bushes and two bolts however I had to remove the drag link to give me access to one of the retaining bolts on the axle.
Remove the ball joint with the ball joint removing tools and mine was a 17mm for the nut and 19mm for the tool.
Once you have removed the Panhard Rod find a socket that fits the outer metal ring of the bush, not too big as we need it to go through the surround.
Slowly press the bush ensuring the press is pushing it square.
Once the bushes are pressed out place the new bush in, and I tapped it in a bit with another socket to ensure the press would press it squarely.
Press the bush fully home
An image of the old ones out and the new ones in, they had definitely gone.
Rebolt on the Panhard rod and place the drag link back on, torque up to required torque settings. Panhard bolts should be as stated in the manual 88Nm (65 ibf/ft)
Now the front radius arms.
I did this with the wheels on, but off would have been easier.
Remove the tie rod.
Remove the large nut where it attaches to the chassis. This was a 30mm nut.
Then using the large socket set remove the radius arm to axle bolts. These were 24mm
I had to use the screw driver just to pry the arm down.
Once the axle end is dropped it should just pull out.
Remove the bushes as previously stated using the press and replace with the new ones as previously done.
This one has also had it, no wonder the steering and cornering wasn’t fab!
Push the bushes home.
The new ones are looking good!
Comparing the old radius arm to chassis bushes!
Now place the first radius arm to chassis bush on and then put through the hole then align with the eyes on the axle and use a jack to put them into place do not tighten anything at this stage.
I had a slight issue, the new axle to radius arm bushes were slightly wider by 5 mm either side, so I had to grind them down, doing it in stages without causing the bush to over heat and damage the new bushes.
If it doesn’t fit don’t force it as you could damage the steel tubes of the bushes.
Once in place and the bolts are to be tightened to as the manual states. Don’t tighten until you have done both sides.
Radius arm to chassis nuts 176 Nm (130 lbf/ft)
Radius arm to axle bolts 197 NM (145 lbf/ft)
Once done replace the tie rod and tighten the ball joint nuts.
Now the rear axle
Ensure you securely block the rear axle to prevent the rear axle moving back too far when you remove the lower suspension link.
Loosen the large chassis to lower link nut, this was also a 30mm
Then loosen the axle to lower suspension link bolt. (24mm)
Ensure the wheel is securely chocked as the rear axle will move backwards slightly when you undo the large chassis nut.
Loosen the three nuts around the chassis link rubber bush. (15mm)
Remove all of the nuts and bolts and the arm should drop out.
Remove the chassis bush.
Once out, as previously press the old bush out, I found these bushes in the lower link harder that the front as the outer metal appeared to be thinner than the front.
Once in do not bolt the chassis rubber bush in as this will prevent you getting the lower link back in. Once the link is in,
the axle bolt should be tightened to 176 Nm (165 lbf/ft) and with the weight of the vehicle, the chassis nut should be 176 Nm (165 lbf/ft)
Since this has been done the vehicle corners and doesn’t wonder like it did. The next task will be the A frame suspension link and ball joint and the shock absorber rubbers.
I hope this helps,
Cheers Mark


1 comments:
G'day,
February 9, 2012 at 9:42 AMThat was a brilliant write-up! Thank you. I will have Mr Bushranger review it so he can fix our truck.
I am about to undertake the same work on our 2006 110. YOu have provided me with a lot of confidence and I reaaly appreciate the time taken to present this excellent tutorial. Cheers Bushranger member of AULRO.
Post a Comment