Part two
First of all if you have the service manual, read it to see how it comes apart.
Then lets get to work, first of all we need to raise the vehicle so the axle is freely suspended in mid air, this will take the tension off of the A frame.

Then undo the bolts which attach the A frame to the chassis (30mm)


Do Not remove these bolts yet as we need to remove the ball joint attachment on top of the axle, this is attached by four 13mm bolts.


Once you have removed the four bolts on top of the axle, remove the bolts from the chassis attachment, at this point one of mine was seized in so I had to remove the chassis bracket consisting on three 17mm nuts and bolts.

Finally it was off and with the help of diesel and a big hammer as one of the bolts had become stuck, but after a few taps it popped out.
Now we have to remove the ball joint, I jammed a screw driver in the holes as I did not have a vice, and it was able to be undone.

Now with the sledge hammer tap the nut end of the ball joint and it should become free of the bracket.

Now it free I could see how badly the ball joint was

Now remove the two bolts either side of the ball joint, these were a 13mm.

One the bolts were removed I had to cut with a grinder the flanges of the ball joint so the press could be used to press it out.

Once cut it should look like this

So it would not put too much stress on the press, I hit the ball joint with the hammer to loosen the rust around it. Then I put it in the press and pressed it out.

Once ou
t we need to put the new one back in.
Finding a large socket, a small amount of grease, and the sledge hammer tap the ball joint home ensuring the bolt holes line up.

Make sure the ball joint is snuggly fit, and refit the bolts with some thread lock.

Place the axle bracket back on and tighten the nut and then put the split pin in.

Press the A frame bushes as described in the previous section

Once the new bushes have been replaced put the frame in reverse order and you may need to just tilt the axle slightly to fit the top bolts into the ball joint bracket. Remembering to put stub lock on these too.
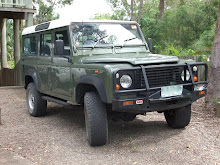
I hope this has helped as my Defender no longer clonks when the drive is taken up and the whole vehicle drives smoother.
Cheers Mark
First of all if you have the service manual, read it to see how it comes apart.
Then lets get to work, first of all we need to raise the vehicle so the axle is freely suspended in mid air, this will take the tension off of the A frame.
Then undo the bolts which attach the A frame to the chassis (30mm)
Do Not remove these bolts yet as we need to remove the ball joint attachment on top of the axle, this is attached by four 13mm bolts.
Once you have removed the four bolts on top of the axle, remove the bolts from the chassis attachment, at this point one of mine was seized in so I had to remove the chassis bracket consisting on three 17mm nuts and bolts.
Finally it was off and with the help of diesel and a big hammer as one of the bolts had become stuck, but after a few taps it popped out.
Now we have to remove the ball joint, I jammed a screw driver in the holes as I did not have a vice, and it was able to be undone.
Now with the sledge hammer tap the nut end of the ball joint and it should become free of the bracket.
Now it free I could see how badly the ball joint was
Now remove the two bolts either side of the ball joint, these were a 13mm.
One the bolts were removed I had to cut with a grinder the flanges of the ball joint so the press could be used to press it out.
Once cut it should look like this
So it would not put too much stress on the press, I hit the ball joint with the hammer to loosen the rust around it. Then I put it in the press and pressed it out.
Once ou
t we need to put the new one back in.
Finding a large socket, a small amount of grease, and the sledge hammer tap the ball joint home ensuring the bolt holes line up.
Make sure the ball joint is snuggly fit, and refit the bolts with some thread lock.
Place the axle bracket back on and tighten the nut and then put the split pin in.
Press the A frame bushes as described in the previous section
Once the new bushes have been replaced put the frame in reverse order and you may need to just tilt the axle slightly to fit the top bolts into the ball joint bracket. Remembering to put stub lock on these too.
I hope this has helped as my Defender no longer clonks when the drive is taken up and the whole vehicle drives smoother.
Cheers Mark


